# Retrieving a CID with IPFS
In this quickstart guide, you will learn the different approaches to retrieving CIDs from the IPFS network and how to pick the most appropriate method for your specific needs.
You will fetch the image with the following CID: bafkreie7ohywtosou76tasm7j63yigtzxe7d5zqus4zu3j6oltvgtibeom.
The CID you will retrieve is actually a folder containing a single image file. The reason for this that when files are added to IPFS, the filename is not stored by default. To retain the filename, it's a common practice to wrap the file in a directory. In such instances, you end up with two CIDs - one for the file and another for the directory containing the file.
# Contents
- IPFS retrieval methods
- Verified vs. trusted CID retrieval
- Fetching the CID with Kubo
- Fetching the CID with Python and ipfsspec
- Fetching the CID with an IPFS Gateway
- Summary and next steps
# IPFS retrieval methods
There are two primary ways to retrieve files and directories published to IPFS:
- Use an IPFS node by installing one of the IPFS implementations, e.g. Kubo on your computer. This allows you to fetch and verify CIDs from other nodes in the IPFS network.
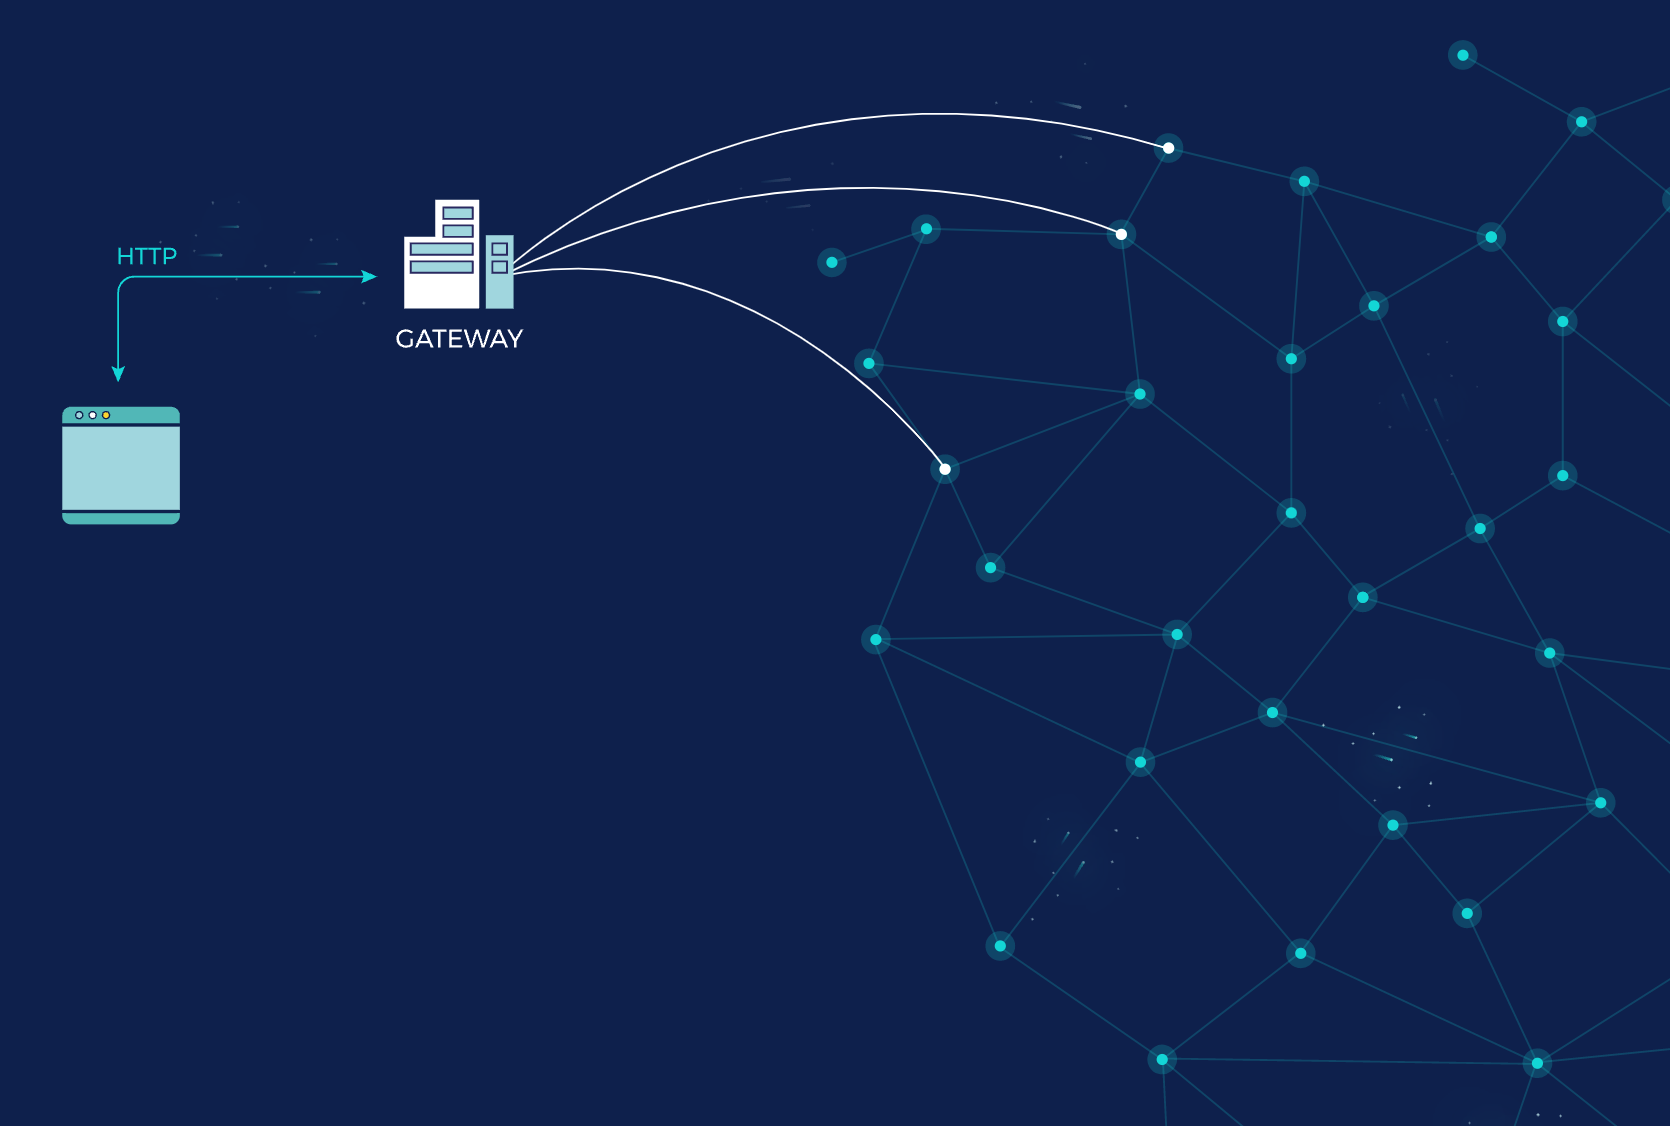
- Use an IPFS Gateway, an HTTP interface with the IPFS network that allows you to fetch data from IPFS using HTTP. Pinning services typically offer an IPFS gateway as a way to easily retrieve your CIDs.
The node option allows you access to the full suite of IPFS protocols. The Gateway option serves as a bridge in situations where you might be constrained to using HTTP, such as in web apps where your app users may not be running an IPFS node.
IPFS Gateways, in their most basic form, are typically IPFS nodes that are hosted by someone else and expose an HTTP interface to fetch CIDs, as shown in the diagram below:
# Verified vs. trusted CID retrieval
Another thing to consider when deciding between the two approaches is verification. By default, an IPFS node hashes each block and ensures that, when the file is constructed from the blocks (into a Merkle DAG), it results in the CID you requested. However, with IPFS Gateways, verification is optional.
Non-verified retrieval is also commonly referred to as trusted retrieval because you're trusting the gateway to return the correct response without calculating the hash.
While verification is almost always recommended, in reality, there are situations where trusted retrieval is the pragmatic choice, such as when embedding images on a website.
# Fetching the CID with Kubo
To fetch the CID with Kubo, complete the steps below:
Ensure that the Kubo daemon is installed and running:
$ ipfs daemonTo fetch the file, run the
ipfs get [CID]command:$ ipfs get bafybeicn7i3soqdgr7dwnrwytgq4zxy7a5jpkizrvhm5mv6bgjd32wm3q4The output should look as follows:
Saving file(s) to bafybeicn7i3soqdgr7dwnrwytgq4zxy7a5jpkizrvhm5mv6bgjd32wm3q4
647.61 KiB / 647.61 KiB [========================================================================================================================] 100.00% 0s
A new folder with the same name as the CID was created:
$ ls bafybeicn7i3soqdgr7dwnrwytgq4zxy7a5jpkizrvhm5mv6bgjd32wm3q4/
welcome-to-IPFS.jpg
Congratulations, you have successfully fetched the CID.
# Verified retrieval with Helia Verified Fetch
Verified Fetch (opens new window) simplifies verified retrieval of CIDs on the web by abstracting away the details of content routing, transports and retrieval. The API is similar to the Fetch API (opens new window), accepting CIDs instead of URLs, returning Response (opens new window) objects.
For example, the following code fetches the image using the verifiedFetch library:
You may notice that there's a path following the CID, e.g. bafybeicn7i3soqdgr7dwnrwytgq4zxy7a5jpkizrvhm5mv6bgjd32wm3q4/welcome-to-IPFS.jpg, because the starting CID is a directory containing the welcome-to-IPFS.jpg file, which you can fetch directly with: verifiedFetch('ipfs://bafkreie7ohywtosou76tasm7j63yigtzxe7d5zqus4zu3j6oltvgtibeom').
# Fetching the CID with Python and ipfsspec
ipfsspec (opens new window) is a read-only fsspec (opens new window) implementation for IPFS. It performs verified HTTP retrieval from gateways by fetching CAR files containing Merkle proofs, so you don't have to trust the gateway. It works without a local IPFS node.
Install
fsspecandipfsspec:pip install fsspec ipfsspecFetch the image using
fsspec.open:
import fsspec

cid = "ipfs://bafybeicn7i3soqdgr7dwnrwytgq4zxy7a5jpkizrvhm5mv6bgjd32wm3q4/welcome-to-IPFS.jpg"

with fsspec.open(cid, "rb") as f:
    image_data = f.read()
    print(f"Retrieved {len(image_data)} bytes")
You can also address the file directly by its own CID:
with fsspec.open("ipfs://bafkreie7ohywtosou76tasm7j63yigtzxe7d5zqus4zu3j6oltvgtibeom", "rb") as f:
    image_data = f.read()
To determine which gateway to use, ipfsspec follows IPIP-280 (opens new window). You can point it at a different gateway, via the options, by setting the IPFS_GATEWAY environment variable or writing the gateway URL to ~/.ipfs/gateway.
# Fetching the CID with an IPFS Gateway
To fetch the CID using an IPFS gateway is as simple as loading one of the following URLs:
- https://ipfs.io/ipfs/bafybeicn7i3soqdgr7dwnrwytgq4zxy7a5jpkizrvhm5mv6bgjd32wm3q4 (opens new window)
- https://dweb.link/ipfs/bafybeicn7i3soqdgr7dwnrwytgq4zxy7a5jpkizrvhm5mv6bgjd32wm3q4 (opens new window)
- https://inbrowser.link/ipfs/bafybeicn7i3soqdgr7dwnrwytgq4zxy7a5jpkizrvhm5mv6bgjd32wm3q4 (opens new window)
inbrowser.linkis powered by the Service Worker Gateway (opens new window) which handles retrieval and verification in the browser, also leveraging in-browser caching, making subsequent loads faster, and local when you're offline.
# Summary and next steps
In this quickstart guide, you learned the different approaches to retrieving CIDs from the IPFS network and how to pick the most appropriate method for your specific needs.
You then fetched the image that was pinned in the publishing with a pinning service quickstart guide using an IPFS Kubo node and an IPFS Gateway.
Possible next steps include:
- Learn more about how IPFS works and the lifecycle of data in IPFS.